
최근 CSS에 대해 관심이 많던 도중, Tailwind 프레임워크가 눈에 들어와서 이를 공부하게 됬다. 몇 개의 미니프로젝트도 해봤었는데 CSS자체에 조금 허덕였던 나에게는 좋은 도구인 것 같아서 한번 소개해보고자 한다.
Tailwind가 뭐고 왜 쓰는데요?
tailwind는 Utility-First(미리 세팅된 유틸리티 클래스를 활용하여 HTML코드 내에서 스타일링) 을 지향하는 CSS 프레임워크 입니다. CSS의 각 속성들을 클래스에 직관적으로 표현함으로써 효율적으로 html 파일 내에서 작성함으로써, 빠르게 구축한다는 것에 이점을 두고 있습니다.
tailwind을 이용하여 코드를 작성한 예시는 아래와 같습니다.
- Tailwind 적용 전
<div class="chat-notification">
  <div class="chat-notification-logo-wrapper">
    <img class="chat-notification-logo" src="/img/logo.svg" alt="ChitChat Logo">
  </div>
  <div class="chat-notification-content">
    <h4 class="chat-notification-title">ChitChat</h4>
    <p class="chat-notification-message">You have a new message!</p>
  </div>
</div>

<style>
  .chat-notification {
    display: flex;
    max-width: 24rem;
    margin: 0 auto;
    padding: 1.5rem;
    border-radius: 0.5rem;
    background-color: #fff;
    box-shadow: 0 20px 25px -5px rgba(0, 0, 0, 0.1), 0 10px 10px -5px rgba(0, 0, 0, 0.04);
  }
  .chat-notification-logo-wrapper {
    flex-shrink: 0;
  }
  .chat-notification-logo {
    height: 3rem;
    width: 3rem;
  }
  .chat-notification-content {
    margin-left: 1.5rem;
    padding-top: 0.25rem;
  }
  .chat-notification-title {
    color: #1a202c;
    font-size: 1.25rem;
    line-height: 1.25;
  }
  .chat-notification-message {
    color: #718096;
    font-size: 1rem;
    line-height: 1.5;
  }
</style>
- Tailwind 적용 후
<div class="p-6 max-w-sm mx-auto bg-white rounded-xl shadow-lg flex items-center space-x-4">
  <div class="shrink-0">
    <img class="h-12 w-12" src="/img/logo.svg" alt="ChitChat Logo">
  </div>
  <div>
    <div class="text-xl font-medium text-black">ChitChat</div>
    <p class="text-slate-500">You have a new message!</p>
  </div>
</div>
Tailwind 장점, 단점
이는 Tailwind 3.0 버전을 기준이며 버전이 높아질수록 단점에 대한 문제를 상쇄한다던가 하는 차이가 생길 수 있습니다.
- 장점
- 클래스 이름을 고민하지 않아도 된다.
- 기본적으로 제공하는 BreakPoint가 있기에 반응형 디자인을 쉽게 구현 할 수 있다.
- 따로 커스터마이징 가능
- 다크 모드 지원
- 단점
- 코드의 직관성은 좋으나 가시성이 떨어진다.
- 동적 스타일링을 하기위한 자바 스크립트 변수 값 활용 불가능 하다.
- 특정 프리픽스는 모든 CSS 속성을 지원하지 않는다.
Tailwind 설치
Tailwind을 사용하는 방법은 여러가지가 있습니다. 만약 프론트 프레임워크에서 사용한다면 공식문서에 참조되어 있는 가이드 문서를 보면서 진행을 하면 되고, 아래에는 좀 더 빠르게 tailwind을 사용하는 환경을 만들기 위해, Tailwind CLI을 이용하는 방법과, CDN을 이용하는 방법을 소개하려고 합니다.
Tailwind 설치 공식문서 가이드 : https://tailwindcss.com/docs/installation
Installation - Tailwind CSS
The simplest and fastest way to get up and running with Tailwind CSS from scratch is with the Tailwind CLI tool.
tailwindcss.com
- CDN을 이용한 방법
CDN을 사용하게 되면 빌드 단계 없이 브라우저에서 바로 Tailwind을 사용할 수 있습니다. 하지만 이는 개발 목적으로만 설계 되었기에 만약 프로덕션 단계에서 배포까지 할 생각이라면 Tailwind CLI 방법이나 다른 방법을 통해 Tailwind을 사용하는 것을 권장하고 있습니다.
사용방법은 간단하다. <head> 태그안에 <script src="https://cdn.tailwindcss.com"></script> 을 넣어준 다음, Tailwind을 사용하면 됩니다.
- index.html
<!doctype html>
<html>
<head>
  <meta charset="UTF-8">
  <meta name="viewport" content="width=device-width, initial-scale=1.0">
  <script src="https://cdn.tailwindcss.com"></script>
</head>
<body>
  <h1 class="text-3xl font-bold underline">
    Hello world!
  </h1>
</body>
</html>
만약 tailwind를 사용함에 있어서 커스터마이징이 필요하다 싶으면 tailwind.config 항목을 추가하여 설정을 변경하면 됩니다. 아래는 tailwind.config 항목을 추가하여 tailwind을 커스터마이징 하는 예시입니다.
- index.html
<!doctype html>
<html>
<head>
  <meta charset="UTF-8">
  <meta name="viewport" content="width=device-width, initial-scale=1.0">
  <script src="https://cdn.tailwindcss.com"></script>
  <script>
    tailwind.config = {
      theme: {
        extend: {
          colors: {
            clifford: '#da373d',
          }
        }
      }
    }
  </script>
</head>
<body>
  <h1 class="text-3xl font-bold underline text-clifford">
    Hello world!
  </h1>
</body>
</html>
- Tailwind CLI
일단 해당 과정을 하기 위해서는 노드가 설치되어야 합니다. 설치는 https://nodejs.org/en 링크에서 하시면 됩니다.
Node.js
Node.js® is a JavaScript runtime built on Chrome's V8 JavaScript engine.
nodejs.org
터미널에 다음 명령어를 실행합니다.
npm install -D tailwindcss
npx tailwindcss init
해당 명령어를 실행하게 되면 tailwind.config.js 파일이 생기게 될텐데 content 부분을 아래와 같이 수정합니다.
- tailwind.config.js
/** @type {import('tailwindcss').Config} */
module.exports = {
  /* 아래와 같이 수정합니다. */
  content: ["./src/**/*.{html,js}"],
  theme: {
    extend: {},
  },
  plugins: [],
}
자신이 사용하고자 하는 메인 CSS 파일을 만들어 해당 부분을 작성합니다. 공식 홈페이지에서는 src 폴더를 만들어 그 폴더 안에 input.css 파일을 만든뒤 진행합니다.
@tailwind base;
@tailwind components;
@tailwind utilities;
다음 명령어를 터미널에 입력합니다. 만약 자신이 만든 css파일 경로가 다르다면, 그에 맞게 수정하면 됩니다.
npx tailwindcss -i ./src/input.css -o ./dist/output.css --watch
여기까지 완성이 됬다면, dist폴더 안에 output.css 파일이 생겼고 이를 통해서 TailwindCSS을 사용할 준비를 마친 겁니다.
TailwindCSS에서 제공하는 클래스를 사용하기 위해서는 html 문서를 작성할때 <link> 태그를 이용하여 가져온 뒤 사용할 수 있습니다.
html에서 tailwind을 사용하기 위해서는 <link> 태그를 이용하여 output.css 파일을 연결한 뒤, 사용합니다. 아래는 그 예시 코드 입니다.
- src/index.html
<!doctype html>
<html>
<head>
  <meta charset="UTF-8">
  <meta name="viewport" content="width=device-width, initial-scale=1.0">
  <link href="/dist/output.css" rel="stylesheet">
</head>
<body>
  <h1 class="text-3xl font-bold underline">
    Hello world!
  </h1>
</body>
</html>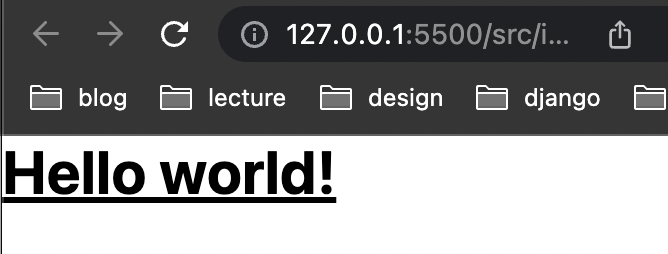
성공적으로 Tailwind가 적용되었음을 확인 할 수 있었습니다.
'FrameWork > Tailwind' 카테고리의 다른 글
| 트랜스폼, 애니메이션 조절하기 (1) | 2023.11.06 |
|---|---|
| 플렉스, 그리드 조절하기 (0) | 2023.11.05 |
| 테두리, 필터, 상호작용 조절하기 (0) | 2023.11.05 |
| 공간 사이즈, 레이아웃, 그림자와 그라데이션 조절하기 (0) | 2023.11.05 |
| 색 , 컨테이너와 공간, 타이포그래피 조절하기 (0) | 2023.11.05 |